Your Gauge Swatch Is Gaslighting You — Here's How to Finally Trust the Process
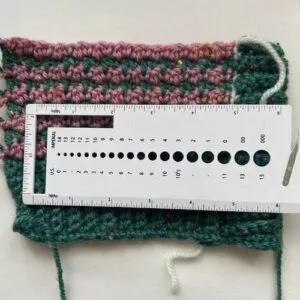
Photo: crochet gauge swatch with ruler measurement on wooden table, via bluestarcrochet.com
You made the swatch. You counted the stitches. You even pulled out a ruler like a responsible adult. And yet somehow, the finished project came out completely wrong.
Welcome to one of crochet's most frustrating plot twists. Gauge swatching has a reputation for being the boring homework you skip before getting to the fun part — but even the crafters who do swatch still get burned. The problem isn't that you're doing it wrong, exactly. It's that there are a dozen invisible variables quietly working against you, and nobody talks about them.
Let's change that.
Why Gauge Is More Complicated Than It Looks
At its core, gauge is just a measurement: how many stitches and rows fit into a 4-inch square. Simple, right? Except your hands are not a machine. Your tension shifts depending on whether you're anxious, relaxed, binge-watching TV, or crocheting in a car. It changes when you switch yarn brands, even within the same weight category. It responds to hook material — aluminum hooks create a slicker surface that lets yarn glide faster, while wooden or bamboo hooks create just enough grip to slow things down and tighten your stitches.
Then there's yarn behavior. A squishy merino wool behaves completely differently from a crisp cotton, even at the same gauge. Acrylic blends bounce back; linen drapes. What looks like a matching gauge on paper can produce wildly different fabric structures in practice.
And that's before we even get to the swatch itself.
The Swatch Trap Nobody Warns You About
Here's the real problem: your swatch lies because you treat it differently than you treat your actual project.
When you swatch, you're focused and deliberate. You're thinking about your tension. You're working a small piece with a clear beginning and end. But when you settle in for a three-hour project session? Your hands loosen up. You get comfortable. Your tension drifts.
Most crocheters also make their swatches too small. A 4-inch swatch sounds like enough, but the stitches at the very edges of any crocheted piece behave differently than the ones in the center. If your swatch is 4 inches, you've got almost no usable measurement space. The standard advice is to make a 6-inch square minimum, then measure only the interior 4 inches. That edge buffer matters more than most beginners realize.
Another sneaky issue: swatching in the flat when your project works in the round. Your tension in the round is almost always different from your flat tension because you're never turning your work. If you're making a hat or a seamless sweater, your swatch needs to reflect that. Work in the round — even if it means making a little tube — and your measurements will be far more accurate.
Hook Material and Yarn Weight: The Hidden Variables
Let's talk about hooks for a second, because this is where a lot of crafters get tripped up.
If a pattern was designed using an aluminum hook and you're swatching with an ergonomic rubber-grip hook of the same size, your gauge can be off by half a stitch or more per inch. That sounds tiny until you're 12 inches into a cardigan. Always swatch with the exact hook you plan to use for the finished project — same brand, same material, same grip.
Yarn weight labeling is another area where the craft industry is... let's say optimistic. A yarn labeled as worsted weight from one brand can be noticeably thicker or thinner than a worsted from another. The yarn label's suggested gauge is a starting point, not a guarantee. Your hands are not the same as the hands that tested that yarn, and your hook isn't either.
When in doubt, go up a hook size and swatch again. The goal is fabric that matches both the stitch count and the drape the pattern intends. A technically correct gauge measurement on a stiff, dense fabric won't serve you in a flowy summer top.
A Framework for Swatches You Can Actually Trust
Okay, so how do you actually get this right? Here's a process that works:
Step 1: Make it bigger than you think you need to. Aim for at least a 6x6-inch swatch. More surface area means more accurate data.
Step 2: Match your real conditions. Use the same hook material you'll use for the project. Work in the same stitch pattern the project uses. If it's worked in the round, work your swatch in the round.
Step 3: Wash it first. Before you measure anything, wash and block your swatch exactly the way you'll care for the finished item. Yarn relaxes, shrinks, or stretches when it gets wet. Cotton especially will change dramatically after its first wash. Measuring a pre-washed swatch gives you fantasy data.
Step 4: Let it rest. After blocking, let the swatch dry completely and sit for a few hours before measuring. Wet or freshly blocked fabric is still in flux.
Step 5: Measure in multiple spots. Don't take one measurement from one location. Count stitches in three different spots across the interior of your swatch and average them. Same goes for row count.
Step 6: Adjust and re-swatch if needed. If your gauge is off, go up or down a hook size and do it again. Yes, really. A second swatch is so much faster than ripping out six inches of a sweater body.
When Your Gauge Is Right But the Project Still Goes Wrong
Sometimes you nail your swatch and the project still doesn't fit. This is maddening, but it usually comes down to one of two things: your tension drifted over the course of a long project, or the pattern's stitch counts were written with a specific ease amount that doesn't work for your body.
For tension drift, try doing a quick check-in swatch every few hours of work on a large project. Just crochet a few rows and measure. If your gauge is creeping, take a break and consciously reset before continuing.
For fit issues, always cross-reference the finished measurements in the pattern against your actual body measurements before you start, not after. Choose your size based on finished garment measurements plus the ease the designer intended, not just your standard clothing size.
The Real Secret to Good Gauge
Here's the thing nobody wants to hear: getting gauge right is a skill that takes practice, and it involves a lot of trial and error. Even experienced crocheters re-swatch. Even designers get surprised by yarn behavior.
But once you understand why your swatch was lying to you — the tension drift, the edge distortion, the pre-wash measurements — you can start troubleshooting with confidence instead of just feeling defeated.
Gauge isn't the enemy. It's actually the one tool in your arsenal that can save an entire project before it goes sideways. Learn to read it honestly, and you'll spend a lot less time ripping things out.